|
Battle of Port Republic, Virginia
A Civil War History
Battle of Port Republic, Virginia
County: Rockingham, Virginia
General Location: N. of rte. 659, S. of rte. 708, between South
Fork Shenandoah and state rte. 340. Village of Port Republic
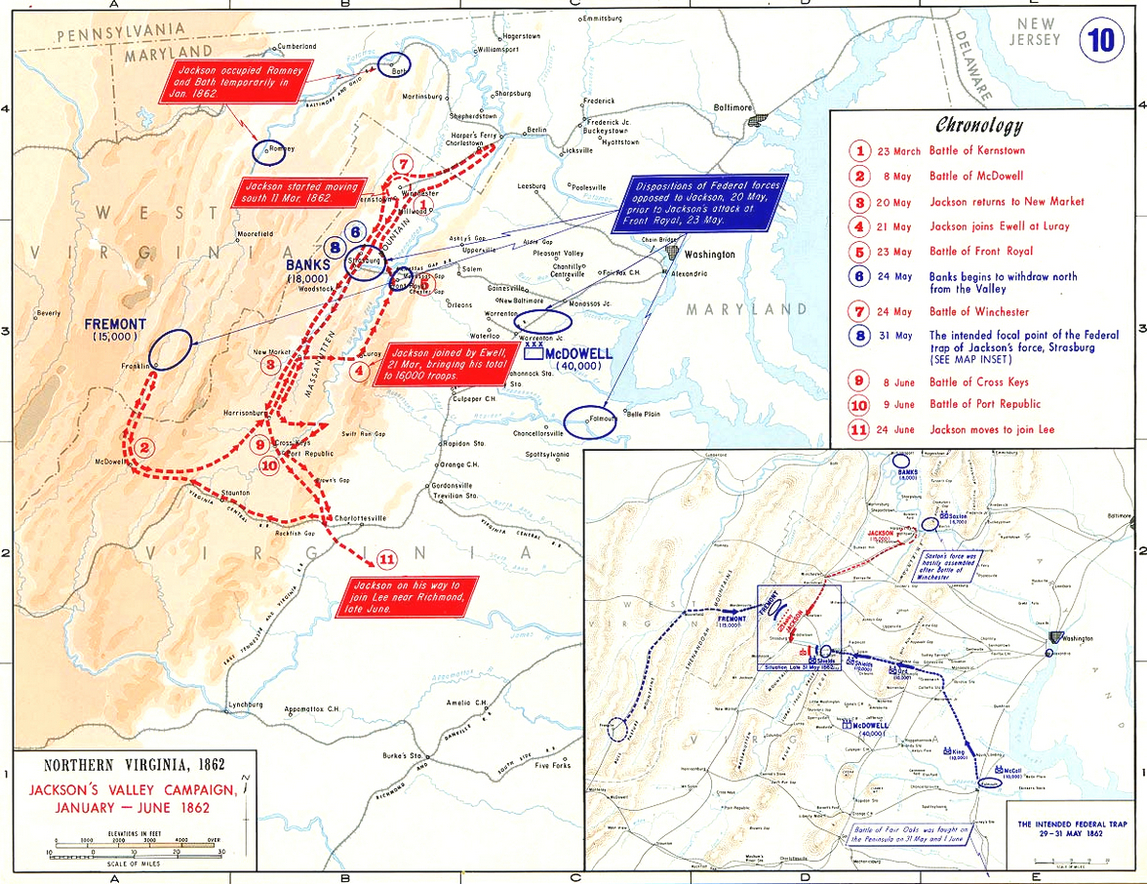
Campaign: Jackson's Shenandoah Valley Campaign (1862)
Principal Commanders: [c] Maj. Gen. T. J. "Stonewall" Jackson;
[u] Brig. Gen. E. B. Tyler
Forces Engaged: [c] Jackson's and Ewell's divisions, about 6,000
engaged; [u] Two brigades of Shields's division (Tyler and Carroll), about 3,500
Casualties: [c] 816 (88k/535w/34m); [u] 1,002 (67k/361w/574m&c)
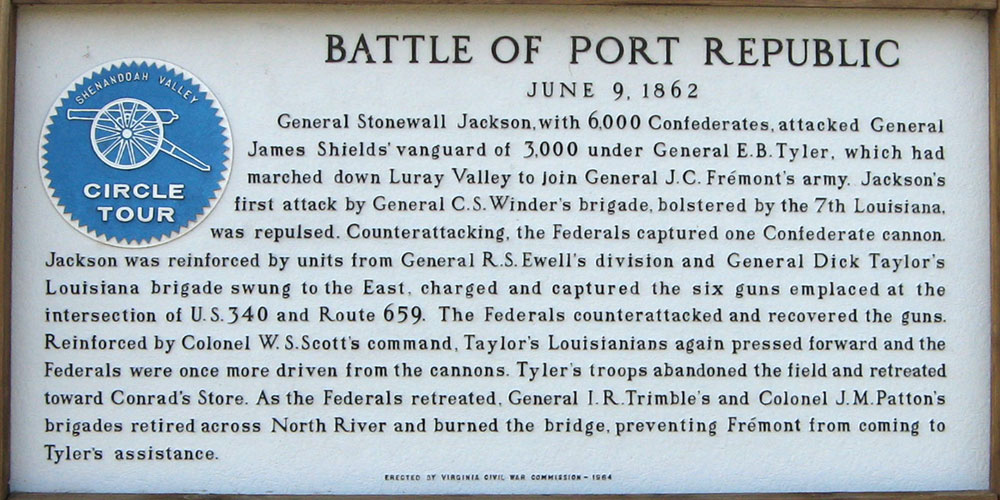
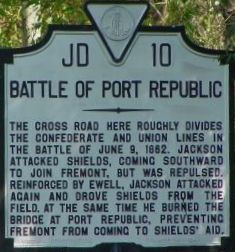
Significance: The battles of Cross Keys and Port Republic were
the culmination of ``Stonewall'' Jackson's Valley Campaign in which Jackson maneuvered to defeat superior Union forces by
surprise, swift marching, and concentration of force. In May and June, Jackson's Army of the Valley (see Jackson's Shenandoah Valley Campaign), which never exceeded 17,000 men, inflicted more than 7,000 casualties on his opponents at a cost of only 2,500 of his own
men, and tied up Union forces three times its strength. Jackson's victories infused new hope in the Confederate cause and
contributed to the defeat of McClellan's campaign against Richmond. The battle of Port Republic was a fierce contest between
two equally determined foes and was the most costly battle fought by the Army of the Valley during its campaign. At its conclusion,
Union forces withdrew down the Valley, freeing Jackson's command to go to the aid of the CS army facing Maj. Gen. George McClellan's
army in front of Richmond. (See Seven Days Battles.)
| Port Republic Virginia and the Civil War |
|
| Battle of Port Republic, Virginia |
| Virginia Civil War Battlefield Map |
|
| Civil War Virginia Battle of Port Republic Map |
Description of the Battle of Port Republic
Dispositions of the Armies: During the night of 8-9 June 1862, Winder's ``Stonewall'' Brigade was withdrawn
from its forward position near Bogota and rejoined Jackson's division at Port Republic. CS pioneers built a bridge of wagons
across the South River at Port Republic. Winder's brigade was assigned the task of spearheading the assault against US forces
south of the river. Trimble's brigade and elements of Patton's were left to delay Fremont's forces at Cross Keys, while the
rest of Ewell's division marched to Port Republic to be in position to support Winder's attack.
US Deployment: Brig. Gen. E. B. Tyler's brigade joined Col. Samuel Carroll's brigade north of Lewiston
on the Luray Road. The rest of Shields's division was strung out along the muddy roads back to Luray. General Tyler, in command
on the field, advanced at dawn of 9 June to the vicinity of Lewiston. He anchored the left of his line on a battery positioned
on the Lewiston Coaling, extending his infantry west along Lewiston Lane (present day rte. 708) to the South Fork near the
site of Lewis' Mill. The right and center were supported by artillery (16 guns in all).
CS Advance on the Left and Center: Winder's brigade crossed the river by 0500 hours and deployed to
attack east across the bottomland. Winder sent two regiments (2VA and 4VA) into the woods to flank the US line and assault
the Coaling. When the main CS battle line advanced, it came under heavy fire from the US artillery and was soon pinned down.
CS batteries were brought forward onto the plain but were outgunned and forced to seek safer positions. Ewell's brigades were
hurried forward to cross the river. Seeing the strength of the US artillery at the Coaling, Jackson sent Taylor's brigade
to the right into the woods to support the flanking column that was attempting to advance through the thick underbrush.
| Virginia Civil War Battle of Port Republic Map |
|
| Virginia Civil War Map |
| Virginia Civil War Historical Marker |
|
| Virginia Civil War Battlefield History Marker |
US Counterattack: Winder's brigade renewed its assault on the US right and center, taking heavy casualties.
General Tyler moved two regiments from the Coaling to his right and launched a counterattack, driving CS forces back nearly
half a mile. While this was occurring, the first CS regiments probed the defenses of the Coaling but were repulsed.
Fighting at the Coaling: Finding resistance more fierce than anticipated, Jackson ordered the last
of Ewell's forces still north of Port Republic to cross the rivers and burn the North Fork bridge. These reinforcements began
to reach Winder, strengthening his line and stopping the US counterattack. Taylor's brigade reached a position in the woods
across from the Coaling and launched a fierce attack, which carried the hill, capturing five guns. Tyler immediately responded
with a counterattack, using his reserves. These regiments, in hand-to- hand fighting, retook the position. Taylor shifted
a regiment to the far right to outflank the US battle line. The CS attack again surged forward to capture the Coaling. Five
captured guns were turned against the rest of the Union line. With the loss of the Coaling, the Union position along Lewiston
Lane became untenable, and Tyler ordered a withdrawal about 1030 hours. Jackson ordered a general advance.
| Virginia Civil War Port Republic Battlefield Map |

|
| Virginia Civil War Map |
Tyler's Retreat/Fremont's Advance: Taliaferro's fresh CS brigade arrived from Port Republic and pressed
the retreating Federals for several miles north along the Luray Road, taking several hundred prisoners. The Confederate army
was left in possession of the field. Shortly after noon, Fremont's army began to deploy on the north bank of the South Fork,
too late to aid Tyler's defeated command. Fremont deployed artillery on the high bluffs to harass the CS forces. Jackson gradually
withdrew along a narrow road through the woods and concentrated his army in the vicinity of Mt. Vernon Furnace. Jackson expected
Fremont to cross the river and attack him on the following day, but during the night Fremont withdrew toward Harrisonburg.
Sources: National Park Service; Civil War Trust; Official Records of the
Union and Confederate Armies.
|
